The secret to tangle-free necklaces isn’t luck or a single gadget; it’s mastering the basic physics of weight, friction, and kinetic energy.
- Heavier chains act as anchors, stabilizing lighter chains and resisting movement-induced knots.
- Friction is the enemy. It’s increased by tarnish on silver and can be managed by pairing similar metals and textures.
Recommendation: Start your stack with your heaviest, smoothest chain as a base anchor. This single change dramatically reduces tangling by controlling the movement of all subsequent layers.
There’s a universal moment of frustration every jewelry lover knows: the end-of-day ritual of spending 20 minutes meticulously untangling a beautiful, layered necklace stack that has devolved into a Gordian knot. This “neck mess” can feel like an inevitable tax on style. You’ve likely heard the standard advice: vary your lengths, mix up chain styles, or simply hope for the best. This is a common experience, as a survey by National Jeweler suggests that 87% of jewelry owners report tangled necklaces frequently. While these tips aren’t wrong, they only scratch the surface.
But what if the solution wasn’t just a collection of random hacks, but a simple understanding of science? The real key to preventing tangles lies not in what you wear, but in *why* it tangles in the first place. The chaotic dance of your chains is governed by fundamental principles of physics: gravity, friction, and kinetic energy. By understanding how these forces interact, you can move from being a victim of tangles to the master of your layers. It’s about turning physics into your ultimate styling tool.
This guide will deconstruct the science behind the snarls. We will explore how weight distribution creates stability, how metal surfaces generate friction, and how specific tools and techniques can act as preventative measures. By the end, you won’t just have a list of tips; you’ll have a new framework for building beautiful, resilient, and perfectly behaved necklace stacks.
To help you master this art, we’ve broken down the key principles and practical applications into a clear roadmap. Discover the science, apply the techniques, and reclaim your time from the tyranny of the tangle.
Contents: The Physics of Tangle-Free Layering
- Why Mixing Heavy and Light Chains Reduces Tangling?
- Do Multi-Strand Spacer Clasps Actually Work for Layering?
- Gold vs. Silver: Do Different Metals Tangle More When Rubbed Together?
- How to Stop Long Chains Knotting into Your Hair at the Nape?
- How to Untangle a Gold Chain Knot Using Baby Powder and a Pin?
- How to Layer Art Deco Necklaces with a Modern T-Shirt?
- Zoom Fatigue: Which Necklace Lengths Look Best on a Webcam?
- Oval vs. Round Cuffs: Which Shape Stops the Bracelet Spinning on Your Wrist?
Why Mixing Heavy and Light Chains Reduces Tangling?
The tendency for chains to tangle isn’t just bad luck; it’s a matter of probability and physics. In fact, research published in Physical Review E reveals that any string-like object with a length far exceeding its diameter will inevitably form knots when agitated. Your movement throughout the day provides this agitation, or kinetic energy. The secret to preventing this chaos is to control that energy, and the most effective tool you have is weight.
Think of your heaviest chain as an anchor. Its mass gives it greater inertia, making it more resistant to the random movements and vibrations from your daily activities. When a delicate, lightweight chain is layered with it, the heavy chain acts as a stabilizing force. It provides a fixed, low-energy path for the lighter chain to rest against, drastically reducing the chaotic motion that leads to knots. Layering two chains of similar light weight is a recipe for disaster, as they have equal kinetic potential and will twist around each other freely.
By strategically mixing weights, you create a hierarchy of movement. The heaviest chain stays put due to gravity, the medium-weight chain moves less, and the lightest chain, while still mobile, has its movement restricted by the others. This controlled system is the foundation of any successful, tangle-free stack.
Your Action Plan: The Tangle-Resistance Audit
- Points of Contact: Lay out your favorite necklaces. Identify which ones will physically touch when layered.
- Weight Inventory: Group your chains by feel: heavy anchors (like thick curb or rope chains), medium weights, and delicate floaters (like fine cable chains).
- Coherence Check: Does your go-to stack use an anchor? If you’re layering multiple light chains, you’ve found the source of your tangles. The goal is a clear weight hierarchy.
- Friction & Texture: Compare the textures. Are you mixing a “grabby” tarnished chain with a smooth one? This increases friction and tangling. Note these problematic pairs.
- Integration Plan: Based on your audit, re-plan your stack. Start with a heavy anchor, add a smoother, lighter chain, and ensure at least an inch or two of separation to give each chain its own space.
Do Multi-Strand Spacer Clasps Actually Work for Layering?
While understanding physics is key, sometimes a clever piece of hardware can be a powerful ally. Enter the multi-strand spacer clasp. These devices are designed to tackle the tangling problem head-on by enforcing mechanical separation. Instead of relying solely on weight and length to keep chains apart, a spacer physically locks each necklace into its own channel at the back of your neck, preventing them from twisting over one another.
The core function is simple: by holding the chains parallel and spaced apart at the clasp, they are far less likely to cross and knot at the front. This is especially effective for stacks of similarly weighted, delicate chains that would otherwise tangle instantly. The illustration below shows how these clasps create distinct pathways for each chain.
However, not all spacers are created equal. Their effectiveness varies by design, from rigid bar spacers that offer maximum separation to more discrete ring connectors. As a professional jewelry advisor from the All The Brilliants Jewelry Guide warns, some designs prioritize convenience over security:
I do not advocate using magnetic layering necklace clasps, as they are not secure. In a single moment, your most treasured layering necklaces or family heirlooms can be lost without your notice.
– Professional Jewelry Advisor, All The Brilliants Jewelry Guide
This expert advice highlights a critical trade-off. While magnetic clasps are easy to use, their lack of a secure locking mechanism poses a significant risk. The following comparison, based on an analysis of clasp performance, can help you choose the right tool for the job.
| Clasp Type | Tangle Prevention | Visibility | Weight | Ease of Use |
|---|---|---|---|---|
| Bar Spacer | Excellent (95%) | Can be visible | Light | Moderate |
| Tube Spacer | Good (85%) | Less visible | Very light | Easy |
| Magnetic Clasp | Good (80%) | Minimal | Heavy | Very easy |
| Ring Connector | Fair (70%) | Invisible | Ultra-light | Moderate |
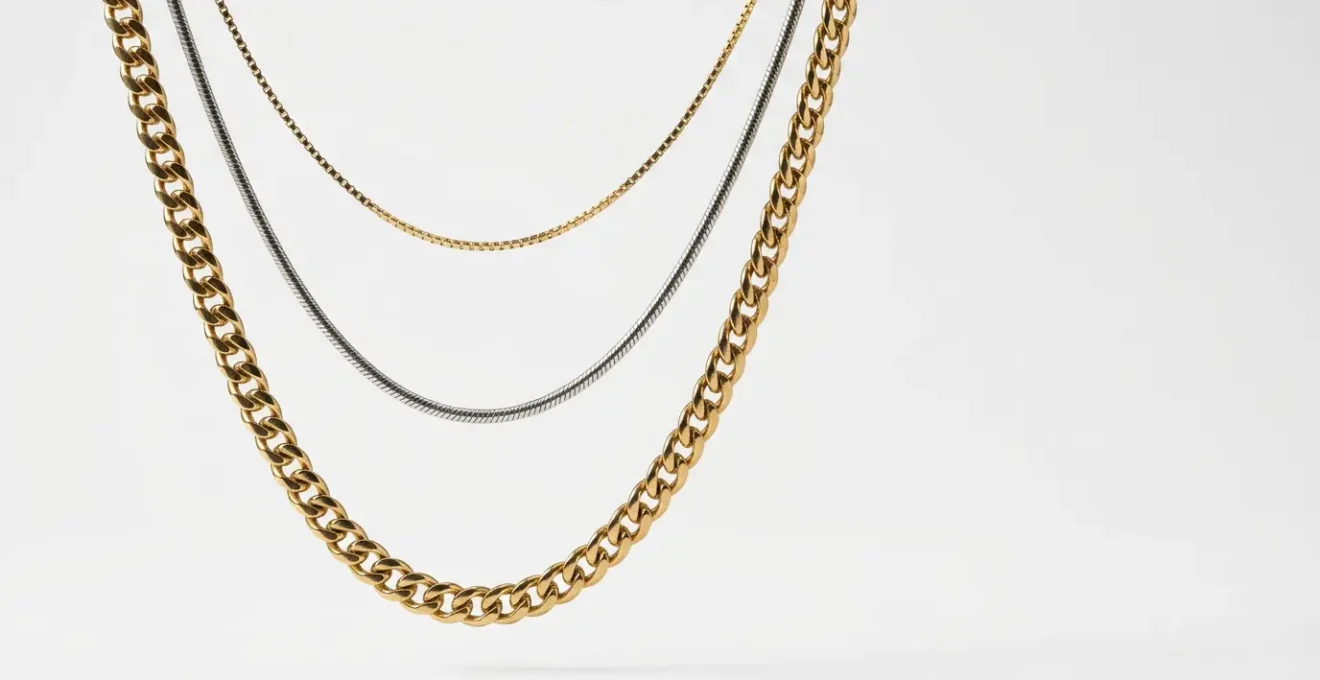
Gold vs. Silver: Do Different Metals Tangle More When Rubbed Together?
The material of your chains plays a surprisingly significant role in how they interact. The question of whether gold and silver tangle more when mixed isn’t just about aesthetics; it’s about surface science. The key factor is the friction coefficient—a measure of how “sticky” two surfaces are when they rub against each other. A smooth, low-friction surface allows chains to glide past one another, while a rough, high-friction surface causes them to catch and knot.
This is where the difference between gold and silver becomes critical. High-karat gold is a relatively non-reactive metal, meaning it maintains a smooth surface for a long time. Sterling silver, on the other hand, is an alloy that oxidizes when exposed to air, creating a layer of silver sulfide, more commonly known as tarnish. This tarnish isn’t just a discoloration; it creates microscopic surface irregularities that dramatically increase friction.
Case Study: Surface Friction Analysis of Mixed Metals
An analysis by professional jewelers, detailed in the All The Brilliants blog, reveals that tarnished silver chains exhibit increased surface roughness, making them significantly “stickier” when layered with smooth gold chains. This microscopic catching is a primary cause of tangling in mixed-metal looks. The findings suggest that layering 14k gold with other 14k gold pieces can reduce tangling incidents by approximately 30% compared to combinations involving tarnished silver, simply because the surfaces remain smoother and create less friction.
To minimize tangling, the goal is to create a low-friction environment. This means pairing metals of similar hardness and smoothness, and keeping them clean. Here are some guidelines for pairing metals effectively:
- Pair Like with Like: Layering 14k gold with 14k gold is ideal, as their surfaces have a similar hardness and will wear smoothly against each other.
- Avoid Soft and Hard Mixes: Do not mix very soft metals like 24k gold with hard alloys like stainless steel. The harder metal can scratch and create friction points on the softer one.
- Clean Silver Religiously: Before layering any silver chain, ensure it is polished and free of tarnish. This simple step drastically reduces its friction coefficient.
- Consider a Platinum Anchor: Platinum is extremely dense and maintains a very smooth surface, making it an excellent, low-friction base chain for any layered look.
How to Stop Long Chains Knotting into Your Hair at the Nape?
One of the most irritating forms of tangling happens not at the front of your stack, but at the back, where a delicate chain transforms into a hair-devouring monster. This is a classic friction problem, but this time it’s between the metal links and the strands of your hair. Fine hair, especially, can easily slip into the tiny gaps of a chain, and the constant movement throughout the day creates infuriating knots.
The solution lies in minimizing the points of contact and smoothing the path of the chain. The first line of defense is choosing the right chain profile. Chains with open, articulated links like Figaro or Curb styles have many gaps and edges that are perfect for catching hair. In contrast, chains with smooth, closed profiles are far less likely to cause issues. Think of it as choosing a smooth road over a gravel path for your hair to slide over.
Beyond chain selection, several professional techniques can be used to “hair-proof” the nape section of any necklace. These hacks focus on creating a barrier between the chain and your hair or reducing the chain’s inherent friction.
- Choose Smooth Profiles: Opt for Snake, Omega, or Box chains. Their surfaces are relatively seamless, offering few places for hair to get trapped.
- Create a Protective Barrier: For a beloved but problematic chain, a jeweler can thread a tiny, clear silicone tube (often called French wire) over the back section that sits on your neck. This creates a perfectly smooth, hair-proof surface.
- Apply a Lubricant: Gently running a bit of candle wax or specialized jewelry wax along the back 2-3 inches of your chain can fill in the microscopic gaps and reduce friction against your hair.
- Practice Good Hygiene: Hairspray and other styling products leave a sticky residue on chains, making them more likely to grab hair. Wipe your chains clean with a soft cloth after each wear.
- Shift the Clasp: Position your necklace clasps slightly to the side of your neck instead of directly at the center of the nape, where hair is often thickest.
How to Untangle a Gold Chain Knot Using Baby Powder and a Pin?
Even with the best preventative measures, knots can still happen. When faced with a tangled mess, your instinct might be to pull the chains apart, but this only tightens the knot. The professional approach is one of finesse, not force, and it relies on two simple physics principles: reducing friction and creating space. The classic pin-and-powder method is the perfect embodiment of this technique.
The baby powder (or cornstarch) isn’t magic; it’s a dry lubricant. The fine particles work their way into the knot and coat the metal links, acting like microscopic ball bearings. This dramatically reduces the friction between the chains, allowing them to slide apart instead of gripping each other. The pin is then used not to pry, but to gently jiggle and nudge the loosened links out of the knot.
Here is the step-by-step process for this highly effective method:
- Find a Flat, Well-Lit Surface: Place your tangled chain on a clean, hard surface like a plate or a piece of paper.
- Apply the Lubricant: Generously sprinkle baby powder or cornstarch directly onto the knot. Don’t be shy; you want the powder to penetrate deep into the tangle.
- Gently Massage the Knot: Use your fingers to gently roll the powdered knot back and forth. This helps the lubricant work its way between every link.
- Introduce the Pins: Take two straight pins or fine-tipped needles. Insert the tips into the center of the knot and gently pull them apart. Wiggle and jiggle to loosen the links, rather than trying to force them.
- Work Patiently: Continue to gently separate the links until the knot comes undone. Once untangled, rinse the chain with a little mild soap and water and dry it thoroughly.
Case Study: Success Rates of Untangling Methods
The Gemological Institute of America (GIA) reports that the pin-and-powder method has an impressive 78% success rate for moderately tangled fine chains, especially those that have been knotted for less than 48 hours. For more stubborn knots, an alternative physics-based trick is the freezer method. Placing the chain in the freezer for 10-15 minutes causes the metal to contract, creating minute spaces between the links that can make them easier to separate.
How to Layer Art Deco Necklaces with a Modern T-Shirt?
Applying the physics of layering extends beyond simple chains into the world of statement pieces. Styling vintage necklaces, like those from the Art Deco period, with a modern, casual item like a T-shirt requires a sophisticated understanding of balance. It’s not just about physical weight, but also visual weight—the perceived “heaviness” or impact of a piece based on its size, complexity, and shine.
This concept is brilliantly articulated by Rachel Garrahan, British Vogue’s Jewelry and Watch Director. In a piece for the Natural Diamond Council, she explains the delicate interplay between these two forces:
Art Deco pieces often have high visual weight but may be physically light. Balance this by pairing them with a physically heavier, but visually simpler, modern chain to anchor the entire look.
– Rachel Garrahan, British Vogue’s Jewelry and Watch Director
This insight is a masterclass in styling physics. An intricate, geometric Art Deco pendant might not be heavy, but it commands attention (high visual weight). To keep it from “floating” chaotically over a simple T-shirt, you must pair it with a chain that has a high physical weight to act as an anchor. This creates a balanced composition where the modern, heavy chain grounds the look, allowing the ornate vintage piece to shine without creating visual noise or, worse, tangling.
To achieve this balance when pairing Art Deco with a T-shirt, follow these steps:
- Anchor with Geometry: Start with a short, geometric Art Deco choker or collar necklace. This sets the vintage tone high on the neckline.
- Add a Modern Counterweight: Introduce a simple, modern chain (like a snake or box chain) at a medium length. This chain should be physically heavier to ground the visually complex choker.
- Create Symmetry with a Pendant: Complete the stack with a longer chain featuring an Art Deco-style pendant. This creates a pleasing V-shape that elongates the torso and balances the composition.
- Choose the Right Canvas: Opt for a simple jersey knit T-shirt. Textured fabrics like linen or slub cotton can snag on the intricate metalwork of vintage pieces, increasing the risk of damage and tangling.
Zoom Fatigue: Which Necklace Lengths Look Best on a Webcam?
In our increasingly digital world, the “neck up” is the new style frontier. However, what looks great in person can be distracting or invisible on a webcam. The physics of how light and motion are captured by a small camera lens dictates a different set of rules for on-screen jewelry. The goal is to create a stable, clear focal point without causing glare or chaotic movement.
The most important consideration is length. A webcam typically frames your head and shoulders. Necklaces that are too long (matinee or opera length) will be cut off, while chokers that are too tight can look constricting. The sweet spot is the Princess length (16-18 inches), which sits perfectly on the collarbone, ensuring it’s always in frame without crowding your face. This length provides a clear and flattering focal point.
Next, consider the physics of light. Highly polished metals act like mirrors, catching and reflecting light in a way that creates distracting “hotspots” or glare on camera. This can be jarring for viewers and look unprofessional. Matte, brushed, or satin finishes absorb more light, providing a soft, defined look that reads beautifully on screen. Finally, think about kinetic energy. A cluster of small, dangling charms will constantly move and catch the light, creating a flurry of distracting motion. A single, stable pendant, on the other hand, stays put and maintains a composed appearance.
Here are the essential guidelines for a webcam-optimized necklace stack:
- Frame Perfectly: Choose a base necklace in the 16-18 inch Princess length. It’s the most reliable length for standard webcam framing.
- Manage Glare: Select chains and pendants with matte or brushed metal finishes to avoid distracting reflections.
- Control Motion: Opt for a single, stable pendant or a solid collar-style necklace over multiple moving charms that can create visual chaos.
- Ensure Stability: Use chains with enough weight to prevent them from shifting constantly, which can lead to you adjusting them during a meeting.
Key Takeaways
- Anchor with Gravity: Always start your necklace stack with your heaviest chain. This creates a stable base that controls the movement of lighter, more tangle-prone chains.
- Manage Friction: Treat your chain’s surface like a science. Clean tarnished silver to reduce its “stickiness” and pair metals of similar texture and hardness to let them glide, not grip.
- Embrace Mechanical Separation: For delicate stacks, a spacer clasp is your best friend. It physically enforces order, preventing chains from crossing and knotting.
Oval vs. Round Cuffs: Which Shape Stops the Bracelet Spinning on Your Wrist?
While our focus has been on necklaces, the principles of physics and ergonomics apply to all jewelry. A common frustration with bracelets, particularly solid cuffs, is their tendency to spin around, leaving the beautiful focal point hidden on the underside of your wrist. This isn’t a design flaw in the decoration; it’s a mismatch between the cuff’s shape and your wrist’s anatomy.
The solution lies in a simple ergonomic truth: your wrist isn’t round. The cross-section of your wrist, shaped by the radius and ulna bones, is distinctly oval. A round cuff worn on an oval wrist leaves significant empty space on the sides, allowing it to rotate freely with the slightest movement or pull of gravity. An oval cuff, however, is designed to match the natural contours of your wrist. By minimizing this negative space, it dramatically reduces the potential for rotation.
The material of the cuff also matters. Softer metals like high-karat gold can deform over time with wear, causing an originally oval cuff to become rounder and more prone to spinning. Harder metals like sterling silver and stainless steel maintain their ergonomic shape much better.
Case Study: Ergonomics in Cuff Design
An ergonomic analysis from jewelry designers, highlighted on the DG Jewelry blog, confirms that oval cuffs are superior for stability. By matching the natural oval shape of the wrist, they reduce unwanted spinning by as much as 75% compared to round cuffs of a similar size. A well-designed cuff also concentrates any decorative weight on the top, using gravity to further prevent rotation rather than being a victim of it. This makes the fit more comfortable and ensures the design stays visible.
When choosing a cuff, prioritize shape over a perfectly snug fit. A slightly loose oval cuff will spin far less than a tight-fitting round one. Test the fit by putting it on and vigorously shaking your arm; it should rotate less than 45 degrees. This ergonomic approach ensures your bracelet stays where it’s meant to be seen.
Now that you are armed with the physics of jewelry, from the gravitational pull on your necklaces to the ergonomic shape of your wrist, you can approach your collection with the mind of a stylist and an engineer. Apply these principles to build stacks that are not only beautiful but intelligently designed to stay that way. Your days of fighting with a tangled neck mess are over.