Your jewellery box is not a passive safe; its construction materials, particularly the glues, are likely the primary source of the corrosive gases tarnishing your silver.
- Most commercial jewellery boxes use adhesives that “off-gas” sulfur compounds, accelerating corrosion even in a closed environment.
- Common solutions like anti-tarnish strips are largely ineffective unless used within a truly airtight micro-climate, something most decorative boxes fail to provide.
Recommendation: Shift your focus from the box’s exterior (wood, leather) to creating chemically inert micro-environments inside it using sealed pouches and professional-grade intercept materials.
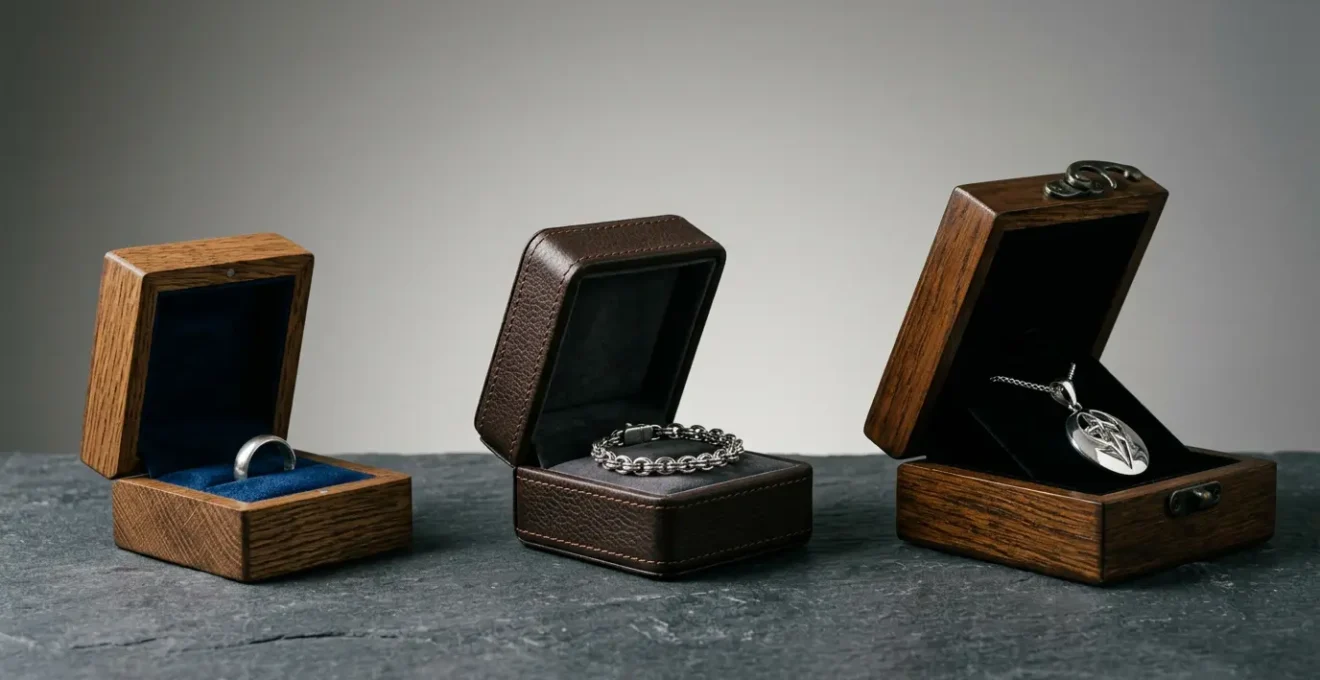
For any dedicated collector, discovering that a cherished piece of silver has developed a dark, dull film while stored in its supposedly protective box is a moment of profound frustration. The common advice—to keep jewellery away from perfumes and moisture—feels hollow when the damage occurs in what should be a safe haven. You may have invested in a beautiful wood, leather, or velvet-lined box, believing it was the best choice for preservation, only to find it has seemingly betrayed its purpose. This experience is not an anomaly; it is a predictable outcome of a fundamental misunderstanding of tarnish chemistry.
The prevailing wisdom focuses on external contaminants, but often, the most significant threat comes from within the storage itself. The very materials used in the construction of many affordable, and even some luxury, jewellery boxes are chemically reactive. They emit a continuous stream of volatile organic compounds (VOCs) that aggressively attack silver and other sensitive metals. The issue isn’t whether the box is made of oak, leather, or velvet, but rather the hidden components like adhesives, dyes, and non-archival fabrics that create a corrosive micro-environment.
This guide moves beyond superficial advice. We will adopt the perspective of a conservation scientist to dissect the hidden chemical enemies within your jewellery storage. Instead of asking which material is best, we will ask a more precise question: how can we create a chemically inert environment to halt corrosion at its source? We will analyze the failure points of common solutions, explore the specific needs of different materials from metals to organic gems, and provide a framework for both proactive prevention and precise, safe cleaning. By understanding the science of preservation, you can finally transform your jewellery box from a source of corrosion into a true vault for your collection.
To navigate this complex topic, we will deconstruct the problem piece by piece. The following sections offer a comprehensive look at the chemical interactions at play in your jewellery box and provide actionable strategies for effective, long-term preservation.
Summary: A Scientific Approach to Jewellery Preservation
- The Hidden Enemy: How Glues in Cheap Jewellery Boxes Corrode Silver?
- Do 3M Anti-Tarnish Strips Really Work in Non-Airtight Boxes?
- Why You Should Never Wrap Opals or Pearls in Cotton Wool?
- Tree or Tray: Which Storage Method Prevents Kinks in Snake Chains?
- Silica Gel Packs: Are They Essential for Storing Watches in the UK?
- How to Clean Dirt from Deep Hallmarks Without Damaging the Stamp?
- How to Dry Pave Settings Without Leaving Water Spots?
- How to Remove Limescale Buildup from Diamond Rings in Hard Water Areas?
The Hidden Enemy: How Glues in Cheap Jewellery Boxes Corrode Silver?
The primary culprit behind silver tarnishing inside a jewellery box is a process known as off-gassing. Many materials used in affordable boxes, especially adhesives, particleboard (MDF), and certain dyes in fabrics, are not chemically stable. Over time, they break down and release corrosive gases, most notably hydrogen sulfide (H₂S) and other sulfur-containing compounds. When these gases come into contact with silver, they trigger a chemical reaction that forms silver sulfide (Ag₂S)—the black or yellowish film we identify as tarnish. The box, meant to be a protective barrier, becomes a concentrated source of the very pollutants it should be excluding.
The concentration of these volatile compounds can be alarmingly high. Research into museum-grade conservation materials highlights the danger; it has been shown that formaldehyde vapor concentrations from common adhesives can reach 10,000 µg/m³, a level far exceeding what is needed to initiate corrosion. While a high-end box made from solid, untreated hardwood and archival linen might be inert, the vast majority of commercial products prioritise aesthetics and cost over chemical stability. The plush velvet lining is often secured with a sulfur-releasing glue, turning the entire interior into a corrosive chamber.
This image demonstrates the microscopic damage in action, as the chemical reaction spreads across the metal’s surface.
The solution is not simply to buy a more expensive box, but to be critical of its construction. True archival storage involves materials that are certified as inert or have passed a Photographic Activity Test (PAT), which ensures they will not cause chemical damage. For a collector, this means either investing in professional-grade storage or, more practically, creating an inert barrier between the jewellery and the potentially reactive box materials.
Do 3M Anti-Tarnish Strips Really Work in Non-Airtight Boxes?
Anti-tarnish strips, such as those made by 3M, are often presented as a simple fix for preventing corrosion. These products work through a process of preferential oxidation or absorption. They contain materials, like activated carbon or fine copper particles, that are more reactive to sulfur compounds than silver is. In theory, they act as a “sacrificial” element, intercepting corrosive gases like hydrogen sulfide (H₂S) before they can reach the jewellery. However, their effectiveness is critically dependent on a single, often-overlooked factor: the volume of air they need to treat.
The fundamental limitation is one of capacity. These strips are designed to create a small, purified atmosphere within an enclosed space. In a perfectly airtight container, a strip can effectively scrub the limited volume of air and maintain an inert environment for a period. The problem is that most decorative jewellery boxes are far from airtight. They have gaps around lids, drawers, and hinges that allow for constant air exchange with the surrounding room. This means the strip is not just fighting the gases already inside the box, but an endless supply from outside.
The specifications reveal this constraint clearly: a single 1×1 inch tab is often rated to protect a very small volume. For instance, data shows a single 1×1 inch anti-tarnish tab protects only 30 cubic inches, which is roughly the space of a 3x5x2 inch box. In a larger, leaky jewellery box, the strip is quickly overwhelmed and exhausted, rendering it useless. It’s like trying to bail out a boat with a thimble while there’s a hole in the hull. Unless you create a sealed micro-climate, the strip provides a false sense of security.
Your Action Plan: Creating Effective Micro-climates
- Isolate and Seal: Place individual silver pieces inside small, airtight polyethylene ziplock bags or, even better, dedicated anti-tarnish cloth pouches made from materials like Pacific Silvercloth.
- Add the Absorber: Place an anti-tarnish strip *inside* each sealed bag or pouch with the jewellery. This drastically reduces the volume of air the strip needs to scrub.
- Incorporate a Desiccant: Add a small silica gel packet to each sealed bag to absorb any trapped moisture, which acts as a catalyst for tarnish reactions.
- Organize within the Box: Use your existing jewellery box to organize these protected “micro-climate” bags and pouches, keeping pieces separate to prevent mechanical scratching.
- Monitor and Replace: Check and replace both the anti-tarnish strips and silica gel packets every few months, as they have a finite capacity for absorption.
Why You Should Never Wrap Opals or Pearls in Cotton Wool?
While an excellent material for many applications, cotton wool is a significant hazard for storing organic gemstones like opals and pearls. The danger lies in its hygroscopic nature. Cotton fibers naturally attract and absorb moisture from the surrounding atmosphere. For a metal object, this is undesirable as it can accelerate tarnish. But for hydrous and organic gems, it is actively destructive. Opals, for example, are a form of amorphous silica that contains a significant percentage of water (typically 3-21%) within their structure. This water is essential for their stability and their characteristic play-of-colour (opalescence).
When an opal is wrapped in dry cotton wool and placed in a low-humidity environment (like a heated home or a safe deposit box), the cotton acts as a desiccant. It actively pulls the structural water out of the gemstone. This dehydration process, known as “crazing,” can cause the opal to develop a network of fine cracks and eventually lose its fire, permanently damaging the stone. Similarly, pearls are composed of layers of nacre, an organic-inorganic composite material held together by an organic protein binder called conchiolin. This binder also requires a certain level of humidity to remain supple. If stored in an overly dry environment, the nacre can become brittle, leading to cracks and a loss of luster.
The preservation principle for these gems is to maintain a stable, moderate humidity—not to eliminate it entirely. As a conservation expert highlights, even the wood of a jewellery box itself can be a source of problems, releasing harmful compounds. The standard for museum-quality storage is clear, as noted in conservation guidelines:
Internal wooden shelving and cabinets should be sealed with good quality water based paint to stop harmful emissions, such as formaldehyde being released from the wood. The internationally recognised time for off-gassing of volatile organic compounds (VOCs) is three weeks.
– Museum Conservation Guidelines, Looking after silver – Museums & Galleries NSW
Instead of cotton, these delicate pieces should be stored in soft, non-abrasive pouches made of silk or velvet, which do not actively draw out moisture. Storing them in a box with a small, open container of water or a dedicated humidifier can also help maintain the necessary environmental balance, protecting their unique and fragile beauty.
Tree or Tray: Which Storage Method Prevents Kinks in Snake Chains?
The choice between a jewellery tree and a compartmented tray is more than an aesthetic preference; it has direct mechanical consequences, especially for delicate chain types like snake, omega, or herringbone chains. These chains are constructed from tightly interlinked plates or wires, giving them a smooth, solid appearance. This structure also makes them highly susceptible to kinking—a sharp, permanent bend that is nearly impossible to repair without leaving a visible mark. The superior storage method is unequivocally the tray with generously sized compartments.
Hanging a snake chain on a jewellery tree subjects it to two primary forces of damage. First is the stress concentration at the point of contact. The entire weight of the chain hangs from a small hook or branch, creating a focused pressure point that can, over time, deform the delicate links. Second, and more immediately damaging, is the risk of accidental snagging or twisting. When hung, chains can easily get caught on each other or be knocked, leading to the sharp, angular bends that cause permanent kinks. A jewellery tree is better suited for more robust designs like curb or rope chains.
The image below illustrates the difference in stress between these two methods.
In contrast, a velvet-lined tray allows the chain to be stored coiled in a loose, wide circle. This method distributes the chain’s weight evenly and, most importantly, avoids any sharp bends. The key is to ensure the coil’s diameter is large enough to prevent the chain from being forced into a tight curve. By always clasping the necklace before storing it and laying it flat in its own compartment, you eliminate both stress points and the risk of tangling with other pieces. For maximum protection against both kinking and tarnishing, the ideal method is to place the loosely coiled chain into a sealed, airtight pouch before placing it in the tray compartment.
Silica Gel Packs: Are They Essential for Storing Watches in the UK?
For watch collectors in the United Kingdom, the question of using silica gel packs is not one of absolute necessity but of strategic risk management, driven by the country’s notoriously damp climate. Silica gel is a desiccant, meaning it absorbs ambient moisture. Its purpose in storage is to lower the relative humidity (RH) within an enclosed space, thereby inhibiting moisture-related damage such as the corrosion of movement parts, degradation of leather straps, or the development of mould on fabric components.
The UK’s climate provides a compelling case for their use. While modern homes have climate control, the ambient outdoor humidity is persistently high. Data for London shows that the average monthly relative humidity ranges from 70% in June to 89% in December. Even indoors, conditions are often far from ideal. UK building regulations aim for healthy living conditions, not archival preservation; average indoor moisture levels in UK homes typically range between 50 to 60%. While a modern, water-resistant watch is sealed against acute water ingress, this pervasive humidity can still pose a long-term threat, especially for vintage pieces or those with compromised gaskets.
High humidity is a catalyst for several issues in watches:
- Internal Condensation: For watches that are not perfectly sealed, high ambient RH increases the risk of moisture entering the case and condensing on the cooler crystal, potentially leading to dial damage and movement corrosion.
- Leather Strap Degradation: Leather is a hygroscopic material. Persistent dampness can cause it to swell, deform, and become a breeding ground for mould.
- Box and Paper Deterioration: For collectors who value the complete set, the original box and papers are part of the asset. High humidity can cause cardboard to soften, warp, and develop mould spots, diminishing the watch’s overall value.
Given these risks, incorporating silica gel packs into a watch box or safe is a low-cost, high-reward preventative measure. They create a stable micro-climate that buffers against the UK’s fluctuating and often high humidity, providing an essential layer of protection for a valuable collection. The packs should be “recharged” (by drying in a low oven) or replaced periodically to maintain their effectiveness.
How to Clean Dirt from Deep Hallmarks Without Damaging the Stamp?
Cleaning dirt and accumulated polish from the intricate recesses of a hallmark requires a delicate, non-abrasive approach. The goal is to dislodge the grime without altering the metal surface or blurring the fine edges of the stamp, which are crucial for the piece’s historical and monetary value. Aggressive polishing, brushing, or using harsh chemical dips can easily cause irreparable damage. A conservationist’s approach prioritizes methods that offer maximum cleaning with minimum contact.
The first and safest step is to use mechanical, non-contact methods. Start by using a can of compressed air, holding it several inches away from the piece. This will often be sufficient to blow out any loose dust, fibers, or dried polishing compound from the hallmark’s crevices. It is a completely non-invasive technique that should always be the initial step before introducing any liquids or tools.
If compressed air is insufficient, the next level of intervention is an ultrasonic cleaner. These devices use high-frequency sound waves to create microscopic cavitation bubbles in a liquid solution. These bubbles implode on the surface of the jewellery, generating a gentle but powerful scrubbing action that can reach deep into the smallest cavities without any physical abrasion. For cleaning hallmarks, the ideal solution is a simple mixture of warm water with a few drops of a pH-neutral, ammonia-free soap. This combination effectively breaks down oils and loosens dirt, allowing the ultrasonic action to lift it away. After the cycle, a thorough rinse with distilled water followed by careful drying is essential.
Only if these methods fail should one consider minimal, targeted contact. A very soft, natural-bristle artist’s brush (like a sable watercolor brush) or a wooden toothpick softened by soaking in water can be used to gently probe the hallmark while it is submerged in the cleaning solution. Hard plastic or metal tools should never be used, as they will inevitably scratch the silver.
How to Dry Pave Settings Without Leaving Water Spots?
Water spots on a freshly cleaned pavé-set ring are not just an aesthetic nuisance; they are mineral deposits that dull the brilliance of the stones and can be difficult to remove from the intricate setting. These spots are the residue of calcium and magnesium carbonates left behind when mineral-rich tap water evaporates. The key to preventing them is a two-fold strategy: displacing the mineral-rich water and controlling the evaporation process.
The most critical step is the final rinse. After cleaning your piece in a soap solution, you must rinse it thoroughly to remove all detergent residue. However, if this rinse is done with standard tap water, you are simply replacing soap with minerals. The professional solution is to perform a final, brief rinse using deionized or distilled water. This highly purified water contains no dissolved minerals and will therefore leave no residue upon evaporation. It effectively washes away the tap water before it has a chance to dry on the surface.
Once rinsed with purified water, the drying method is paramount. Vigorous rubbing with a cloth is not recommended for pavé settings, as fibers can snag on the tiny prongs, potentially loosening a stone. Furthermore, a cloth may not reach the deep recesses between the gems, leaving trapped moisture. The best method is to first gently tap the piece on a soft, lint-free cloth or paper towel to shake off excess water droplets. Then, allow the piece to air dry completely. Placing it on a clean paper towel is effective, but for faster results, a gentle stream of cool air from a hairdryer can be used. It is crucial to ensure the piece is 100% dry before returning it to a jewellery box, as trapping any residual dampness will create a humid micro-climate ripe for tarnishing.
This careful, two-step process of a pure water rinse followed by controlled, non-contact drying will ensure that your pavé pieces emerge from cleaning with maximum sparkle and no dulling mineral spots.
Key Takeaways
- The primary cause of tarnish in a jewellery box is often the off-gassing of corrosive sulfur compounds from adhesives and non-archival materials.
- Anti-tarnish products are only effective within sealed, airtight micro-environments; they fail in standard, leaky jewellery boxes.
- Material-specific storage is crucial: hygroscopic materials like cotton can permanently damage organic gems like opals and pearls by dehydrating them.
How to Remove Limescale Buildup from Diamond Rings in Hard Water Areas?
For those living in hard water areas, the persistent buildup of limescale (calcium carbonate) can be a frustrating problem, leaving a cloudy, chalky film on diamond rings that significantly dulls their sparkle. This buildup occurs when hard water evaporates, leaving mineral deposits that cling to the metal and stones. While diamonds themselves are impervious to most chemicals, the ring’s metal setting—especially if it is silver—is vulnerable. Silver is highly reactive to sulfur, and an analysis of the chemistry shows that silver reacts with sulfur compounds in the air, forming silver sulfide, or tarnish. Removing limescale thus requires a method that dissolves the mineral deposits without harming the metal or any porous gems that might be part of the piece.
The most effective and safest method for dissolving limescale is the controlled use of a mild acid. A solution of warm white vinegar (acetic acid) or lemon juice (citric acid) is ideal for this purpose. The acid reacts with the alkaline calcium carbonate, breaking it down into a soluble salt that can be easily rinsed away. To perform the cleaning, submerge the diamond ring in a small bowl of the warm acidic solution for about 10-15 minutes. For more stubborn buildup, you can gently scrub the setting with a very soft-bristled toothbrush while it is submerged.
A crucial word of caution: this method should never be used on jewellery containing porous or organic gemstones like pearls, emeralds, turquoise, or opals. The acid can etch, pit, or completely dissolve these delicate materials. This technique is safe only for hard, non-porous stones like diamonds, rubies, and sapphires set in gold, platinum, or, with care, silver. After the acid soak, it is vital to rinse the ring thoroughly under running water and then perform a final rinse with distilled water to prevent new water spots. Combining this acidic soak with an ultrasonic cleaner can further enhance the results, as the cavitation will help dislodge the loosened mineral particles from hard-to-reach areas around the diamond’s pavilion and setting.
Frequently Asked Questions about Jewellery Tarnish and Care
Why do water spots form on jewelry after cleaning?
Water spots are not dried water itself, but mineral deposits (primarily calcium and magnesium carbonate) that are left behind after mineral-rich tap water evaporates from the surface.
How can I prevent water spots on pave settings?
After a final rinse with distilled or deionized water, the best method is to let the piece air dry completely on a paper towel. It is critical to ensure pieces are 100% dry before storage to prevent introducing dampness into your jewellery box, which accelerates tarnish.
What’s the best final rinse method?
To prevent mineral deposits, always use deionized or distilled water for the final rinse. This pure water contains no dissolved minerals and will evaporate cleanly, leaving no residue or spots.